
Planning a major home renovation is an exhilarating experience, but it quickly becomes overwhelming once the reality of construction logistics sets in. Most homeowners spend months obsessing over backsplash tiles, paint swatches, and floor plans, only to be caught completely off guard by the sheer chaotic impact a large build has on their actual property. When heavy equipment rolls in, dumpsters land on the driveway, and trade crews begin tearing open walls, an unprepared property turns into a chaotic, hazardous, and expensive mess very quickly.
Site preparation is the invisible foundation of every successful transformation. Managing a smooth remodel comes down to setting up clear operational zones, safeguarding vital utilities, protecting existing landscaping, and establishing strict site logistics before the first hammer hits a piece of framing. Taking a strategic, proactive approach to site management prevents costly delays, avoids structural accidents, and keeps your project moving smoothly from breaking ground to the final inspection.
Phase 1: Heavy Equipment Access and Primary Site Clearing
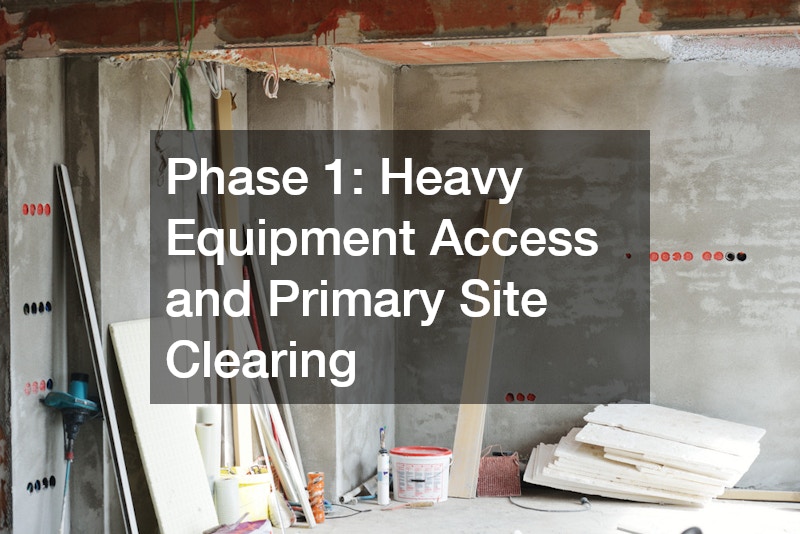
The physical transformation of a property always starts with clearing space and clearing a path. When structural footprints change or heavy machinery moves onto a residential lot, the initial days of site work dictate the flow of the entire project.
Mapping Work Corridors and Clearing Structural Obstacles
Before any heavy machinery arrives, you must establish exact pathways across the yard. Heavy vehicles require clear swing radiuses and solid ground to prevent getting stuck or damaging underground infrastructure.
- Establish a single, designated entry route for all heavy machinery to avoid compacting soil across the entire yard.
- Identify low-hanging tree branches along driveways and trim them back to at least fourteen feet of clearance for high-clearance delivery trucks.
- Mark all underground utility lines by calling local utility locating services before any digging equipment touches the dirt.
- Set up physical barriers around areas that equipment operators must strictly avoid, such as septic drain fields or delicate paved paths.
Managing Teardowns and Earth Moving Operations
Once access paths are clear, site preparation turns to removing old structures and reshaping the terrain. If your project includes an extension, a newly dug foundation, or an expanded basement footprint, heavy excavating becomes the first major operation on site. Earth-moving machinery must be carefully coordinated alongside site clearing so topsoil isn’t permanently mixed with subsoil or contaminated by construction debris.
Simultaneously, if an existing garage, deck, or structural wing needs to be removed, hiring a licensed demolition contractor ensures that structural teardowns happen safely without compromising the main house’s stability. Professional teardown teams understand how to systematically dismantle materials, segregate recyclables, and safely load out tons of heavy debris without causing structural shockwaves to adjacent foundations.
Phase 2: Safeguarding Infrastructure and Core Utilities
Modern homes rely on complex utility networks that are surprisingly vulnerable during heavy construction. A single severed line or unmonitored pressure surge can stall a renovation for weeks while creating massive unexpected repair bills.
Inspecting and Isolating Domestic Water Systems
When a major addition increases a home’s square footage or adds multiple bathrooms, existing plumbing infrastructure is pushed to its absolute limits. Properties relying on private groundwater systems require special attention long before framed walls go up. Increased demand often necessitates an upgraded well pump install to handle the higher gallon-per-minute requirements of additional bathrooms, expanded irrigation, or high-capacity appliances. Addressing this water infrastructure early ensures your system delivers reliable pressure throughout the build and long after the project finishes.
Beyond supply upgrades, protecting existing supply lines during active construction requires strict isolation protocols. Main shut-off valves must be clearly labeled and easily accessible to site supervisors at a moment’s notice. Plumbing runs leading into active demolition zones should be capped and depressurized deep within the house to prevent accidental punctures from high-powered framing nailers or reciprocating saws. Creating a dedicated, temporary water connection outside the main work zone gives trades access to water for mixing mortar or cleaning tools without putting the home’s primary interior plumbing at risk.
Phase 3: Site Staging and Environmental Protection Measures
Managing the flow of materials onto a property requires the same precision as managing trade workers. Without a deliberate plan for where raw materials sit, driveways become blocked, grass dies under heavy pallets, and stormwater washes expensive supplies down the street.
Establishing Dedicated Material Drop Zones
Every major build requires vast amounts of bulk materials delivered over several months. To keep the site functional, assign specific staging zones based on material weight, weather sensitivity, and usage sequence.
- Select a high, flat, well-drained section of the property near the main driveway to serve as the primary heavy material drop point.
- Lay down heavy geotextile fabric topped with a thick layer of crushed stone from a reliable landscape supply dealer to create a mud-free staging pad that supports heavy deliveries.
- Position covered, elevated racks or pallets adjacent to the drop zone so lumber and drywall stay off the damp ground.
- Designate a separate, secured area away from foot traffic specifically for hazmat storage, such as adhesives, fuel, and solvents.
Implementing Erosion Control and Landscape Safeguards
Unprotected soil exposed during site work quickly turns into a muddy nightmare during sudden rainstorms. Installing silt fencing along low-lying property boundaries prevents soil runoff from washing onto neighboring lots or public roadways. Furthermore, trees and established gardens suffer tremendously from root compaction when heavy boots and machinery pass over them repeatedly. Encircling the dripline of valuable trees with rigid temporary fencing keeps heavy foot traffic away from sensitive root zones, preserving your property’s valuable natural shade and curb appeal.
Phase 4: Securing the Exterior Envelope and Interior Isolation
A home under renovation is highly vulnerable to wind, rain, and airborne construction dust. Protecting the living areas and preventing weather intrusion requires sealing the building envelope firmly while installing temporary dust containment systems inside.
Protecting Roof Lines and Exterior Wall Openings
Exposing a home’s structure to the elements is often unavoidable when adding dormers, re-pitching roofs, or tying new additions into existing rafters. Before major structural framing begins, have a professional roof repair service evaluate your existing roof lines. Patching worn shingles, replacing deteriorated flashing, and applying waterproof synthetic underlayment along intersection points guarantees that unexpected rainstorms won’t leak into newly framed interior spaces.
Simultaneously, large structural wall openings and custom window cutouts must be measured, ordered, and scheduled with precision. Working alongside a reputable glass company early in the planning stage ensures that high-performance window units, sliding glass walls, and custom architectural glazing arrive exactly when the framing crew is ready to enclose the building. Having custom glass ready for installation immediately after framing keeps weather out, secures the home against theft, and allows interior trades to begin work in a controlled environment.
Containing Interior Dust and Airborne Debris
When living in a home during a multi-room renovation, keeping construction dust out of clean living quarters is essential for health and sanity.
To isolate dust effectively, set up heavy plastic zip-walls and airtight duct tape barriers to divide the active work zone—where negative air machines pull away airborne dust—from your clean living areas. In the clean zones, seal off HVAC vents completely and deploy high-efficiency air scrubbers to trap any stray particles.
- Build floor-to-ceiling temporary plastic containment walls using heavy-duty six-mil sheeting and sealed zipper entry doors.
- Seal off all return and supply HVAC vents inside the construction footprint using thick plastic sheeting and duct tape.
- Place sticky walk-off mats at every exit point of the work zone to trap dust from boot soles.
- Run portable air scrubbers inside the work zone continuously to pull airborne dust out of the atmosphere before it settles.
Phase 5: Climate Control and Environmental Stabilization
Interior finishing materials like hardwood flooring, custom cabinetry, drywall compound, and interior trim require precise temperature and humidity conditions to cure properly and avoid warping. Maintaining climate control inside the work zone is vital for a high-end finish.
Managing Seasonal Temperatures During Construction
When construction stretches across changing seasons, heating and cooling systems face immense stress. Running central HVAC systems while heavy dust fills the air quickly clogs coils and ruins blower motors. If your central air conditioner fails during a hot summer drywall phase, high humidity will delay joint compound drying times for days. Arranging for prompt ac repair before major interior finishing begins keeps cooling equipment operating efficiently, keeping humidity low and enabling paints, compounds, and adhesives to dry properly.
Similarly, working through cold winter months requires constant, stable ambient heat to prevent frozen water pipes and cracking drywall joint tape. If your furnace shows signs of wear, scheduling needed heating repairs early prevents catastrophic system shutdowns during freezing weather. For major additions disconnected from the main HVAC grid, utilizing heavy-duty electric radiant space heaters provides controlled, clean warmth without circulating fine dust through the rest of the home’s ductwork.
Phase 6: Outdoor Recreation and Backyard Feature Integration
Integrating outdoor amenities into a major property renovation requires foresight. Adding large backyard features requires heavy machinery, extensive plumbing connections, and high-amp electrical upgrades that must be phased alongside main home construction.
Integrating Water Features into Site Infrastructure
When homeowners plan a total indoor-outdoor living upgrade, sequence outdoor installations early while heavy earth-moving equipment is already on site. Digging out space for an inground swimming pool during the initial site excavation phase saves thousands of dollars compared to bringing heavy diggers back later across newly finished driveways and manicured lawns.
The overall project flow begins with initial excavation, moves into pool or spa framing and plumbing, transitions to heavy electrical and utility runs, ties into main house addition work, and finishes with final landscaping and hardscaping details.
For homeowners seeking compact water features or athletic training setups, installing a swim spa offers a versatile alternative that still demands careful pre-planning. Spa pads require thick, reinforced concrete slabs capable of supporting thousands of pounds of water weight. Coordinating crane access, dedicated electrical sub-panels, and drainage routes for these features alongside main house foundation work ensures that outdoor recreational areas integrate smoothly with your overall home design without causing costly re-work later.
Master Execution Checklist for Site Preparation
To keep your renovation running on schedule, follow this step-by-step preparation timeline prior to starting work.
Eight Weeks Before Construction
- Obtain all municipal building, environmental, and tree preservation permits.
- Call 811 or local utility locator services to stake out all underground utility lines across the property.
- Finalize equipment access paths, material staging locations, and dumpster placement zones with your general contractor.
Four Weeks Before Construction
- Schedule specialized subcontractors for preliminary utility upgrades, heavy earthwork, and envelope repairs.
- Trim back overhanging trees and clear brush along primary equipment delivery routes.
- Confirm ordering schedules for long-lead items like custom windows, structural glass doors, and specialized pool equipment.
One Week Before Construction
- Erect tree protection fencing around drip lines and install silt fencing along low-lying property borders.
- Lay down geotextile fabric and stone base layers for heavy material delivery pads.
- Build temporary plastic zip-walls, seal off HVAC vents, and set up air filtration units around interior living spaces.
Navigating the Finished Transformation
Transforming a property through a major renovation is one of the most rewarding investments a homeowner can make. While the process brings noise, dust, and daily activity to your home, a well-prepared property makes every phase safer, cleaner, and significantly more efficient. By mapping out equipment access early, safeguarding essential water and power infrastructure, establishing clean material drop zones, and sealing the building against weather and dust, you protect both your property and your peace of mind.
Successful home renovations are built on thoughtful logistics long before decorative finishes are installed. Taking time to clear pathways, inspect rooflines, service climate control systems, and sequence heavy outdoor installations guarantees that trade crews work safely and efficiently. With clear preparation and careful management, your home project will proceed smoothly from initial ground clearing to the final walkthrough, delivering a beautifully renovated property that stands the test of time.